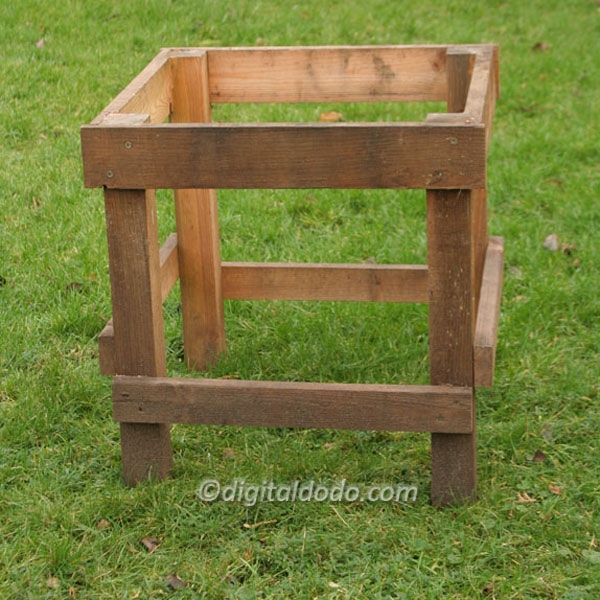
This is a simple hive stand to make and is rigid enough to allow you to move it around an apiary without it collapsing, there is a downloadable plan at the end of the description!
The timber for the stand can be any suitable softwood and if you can get it treated (sometimes referred to as tanalised) then it will make finishing easier.
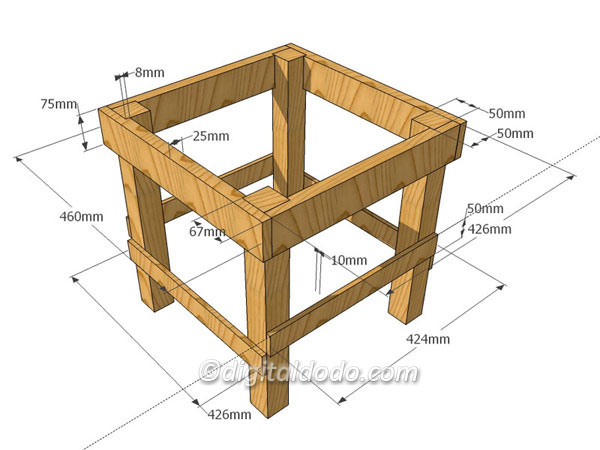
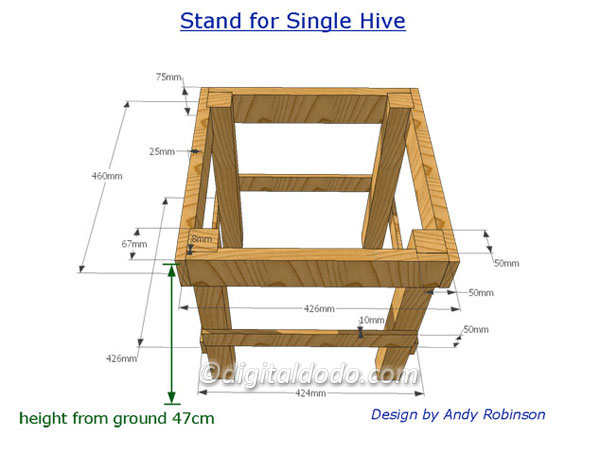
The legs are constructed from 5cm x 5cm timber. The top cross struts that hold the legs in place are 7.5cm x 2.5cm, as these are the main supporting struts I wouldn’t recommend using smaller dimensioned timber for these. The lower bracing cross struts are 5cm x 10mm. So adjust the dimensions accordingly if you use other sizes of timber.
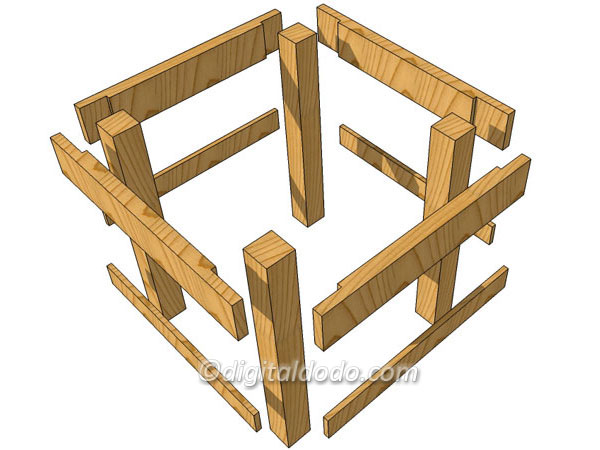
Simple joinery is all that is required to construct the carcass with PVA glue and screws, ideally 50mm long, to assemble the stand.
- Construction technique
1) Make up the top carcass:
a. Cut legs to length – in my case 47.5cm
b. Cut top struts to size – 2 x 426mm and 2 x 460mm. The only tricky bit is to cut a lap joint at each end. For the 460mm pieces the lap joint measures 67mmm long x 8mm deep. For the shorter 426mm pieces it’s 50mm long x 8mm deep.
c. Cut all 4 of the the lower cross struts to 424mm
d. Apply PVA glue to the inside of the lap joints
e. Make up 2 sets of legs by fixing each of the shorter struts to 2 different legs and screw in 2 screws to secure each strut to the leg.
f. Fix the longer struts to each pair of legs to complete the square, again securing with 2 screws
g. Fix the lower struts to the legs using 4 screws for each strut.
- Finishing
Once the glue has dried you can treat the timber with a suitable preservative such as Cuprinol. To give the maximum protection possible to the bottom of the legs let them stand in Cuprinol for 24 hours.
The distance from the top of the stand to the floor is approximately 47cms which I find is the right height for me to inspect my colonies.
![]() Download Plans for Hive Stand Size: 529.7 KB
Download Plans for Hive Stand Size: 529.7 KB


